
Some months ago we were showcasing Trespassers (more shameless self promotion… in our own webpage!) at FIMP ’16, a local event that, in its 4th installment has grown so much as it can be considered a reference in the local scene. It attracts thousands of gamers to its different tournaments on e-sports, other competitive games and Minecraft. And to the local indie scene present there, too, which is always nice. It had passed slightly more than a month since last time we showcased Trespassers back in the first week of October, at Barcelona. We could fix several bugs and, more importantly right now, design problems, although it should make enough content for another, unrelated post.
The point of this post comes from a question another spanish developer team, Ginkgo Games, asked: I was modyfing some effects placed in a camera I use for rendering the background, and he was curious about that. One of the effects he didn’t know about was Color Correction using LUT (Lookup Texture)
The basic idea, as stated in the docs, is that you can “translate” one color from the original image to another one by looking up in the texture given, using the original color as an “index” to select the new one. Anyway, the point for my colleague was: how can we make this work?
First, take a screenshot of what you want to change. Bear in mind that, as this this effect will get applied to a camera, you do not need to consider whatever is not rendered by it. In our case, we will be modifying the background only.
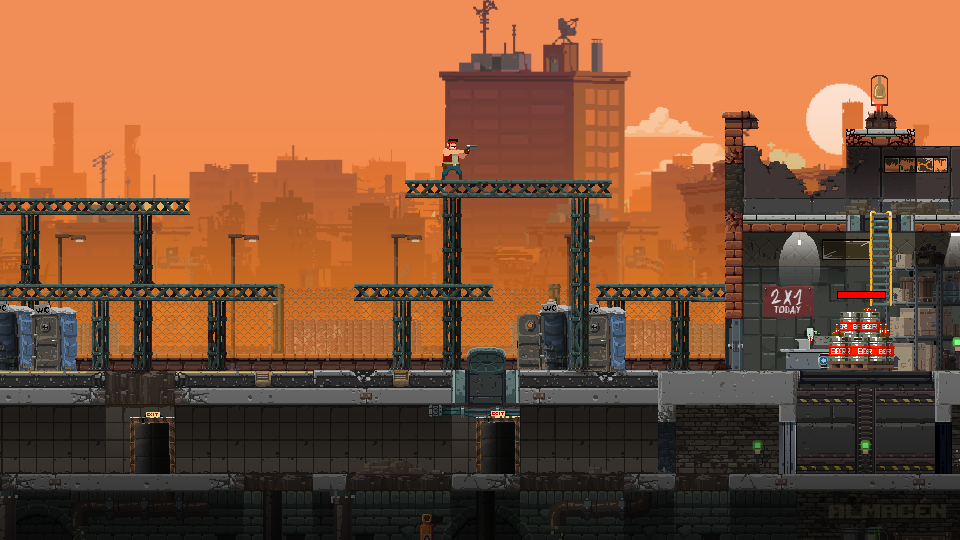
The problem in that picture, from our point of view, is that the background is too saturated, too orange, and mixes with the foreground, and it should be easier on the eyes too. Should we change the whole art? No, here is when Color Correction comes in handy. Bring that picture to your image editing software. We will use Photoshop in this case.
Once in Photoshop, stack modifiers till you get the desired look. Remember, we are changing the background, forget the changes applied to other elements. In the left part of the following image you can see the effects applied, in the bottom left corner, the modifiers used, stacked over the original image, and in the right part, the original image.
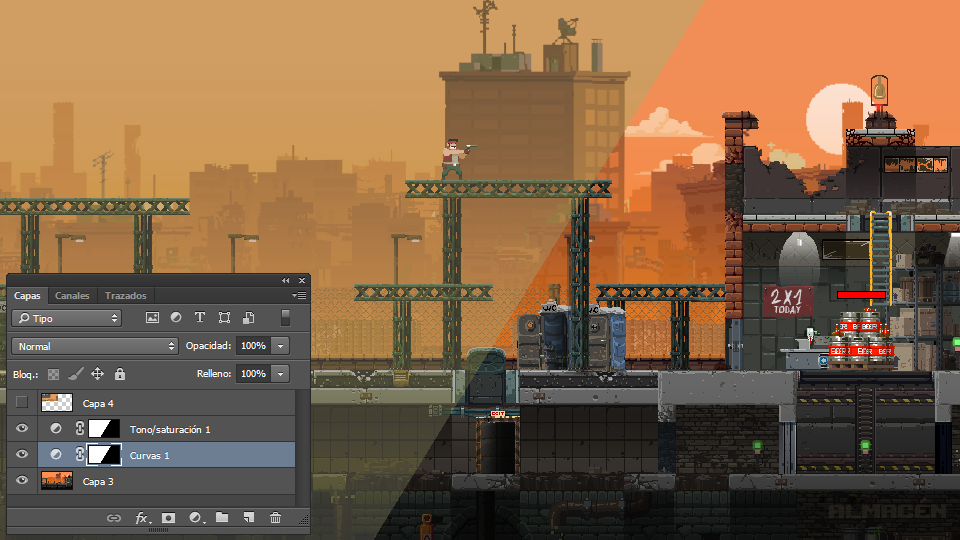
(Note: while writing the post, I lost the effects applied, so I had to edit the effects again and the you may notice subtle differences between this image and the next ones -apart from the name of the first layer)
At this point, we need to translate those changes (or any other you may have) to our Color Correction post effect. This way you can do it:
1.- Grab a “neutral / identity” Lookup Texture. Here you can grab even the code to generate one, although I haven’t tested it. Or in the official docs, there is the following image:

2.- Put it in Photoshop, stacked in the layer right above the reference picture. It does not really matter where you put the LUT as long as all the effects affect the whole texture. Notice how it changed from the more vivid, bright one before, to another a bit more greyish, desaturated, as it did the whole image before.
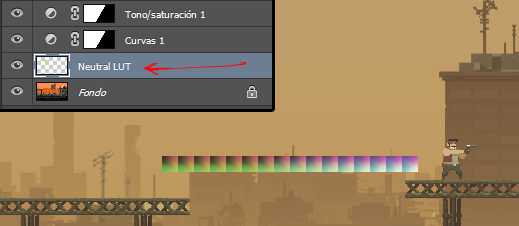
3.- Select the LUT (Ctrl + Click on the layer preview icon, the one framed in the image above), copy with all the modifications (Shift + Ctrl + C in Photoshop) and save it as a new LUT
4.- Feed it to the Color Correction post effect. In case the results didn’t match, try setting the compression of the LUT image to “None”. It is a small image, so artifacts may be an issue.
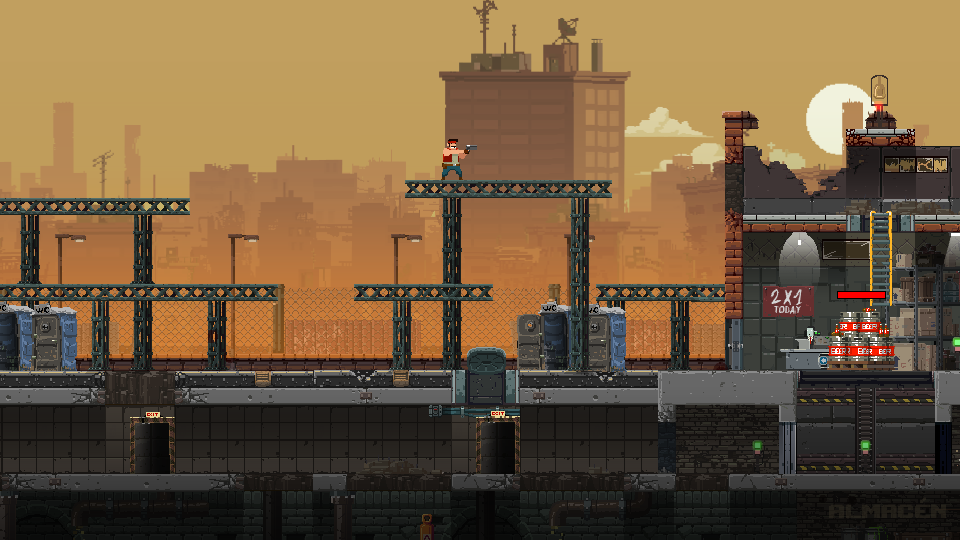
Here are the results with that LUT texture in game. Notice that the orange gradient belongs to a part that is between the foreground and the background, not rendered by the background camera, as many other things. But the buildings far away, the clouds and sky got updated.
Hope it helps you with this effective technique. Feel free to comment ;)!
Leave a Reply